Monday 28 February 2011

Edit Number 3!


Edit 3!

This video shows vast improvement in my eyes as I really started to get the edit to a certain level of completion, where we can really start to refine the look of the film we want.

- I have no added audio to the interference as the comet comes in to give that impression of the tides changing.
- I now added static sound effects and video to the edit. I think this really adds to the momentum as the cuts show abit more drama than no sound at all. The image shows a single frame of a cut out when we about to show the atrium of Godzilla. Who was quite inspiration when we were making out film and he is pointing to where the bad guys are.
- Also finally adding no signal at the end to add to the dramatic send off of screams and creature hurtling towards the screen.

Second Edit


Second Edit!

This time around I really worked into the way things flowed and tried to keep the momentum.

     -When we first start to run you can see how I cut it quickly and tried to focus on the more dynamic shots.
     - Also I starting to add some type of interference when the comet is about to hit. I plan to get some audio to help with adding that alien effect on the camera.

   - The image shows the shot where joe runs though the doors, in the first draft I had a cut here, after looking at the edit I thought it would be nicely to have the shot uncut as I like the way the motion and movement of the camera as it went through the door.


First Edit


Above is the first Edit! I did this quickly to breakdown the footage we had into a quick edit to start to build from. It has started to give us ideas already how to improve it and what its missing!

What I wanted to achieve from this edit is get the key moments that really gave use scope in the CG parts. I tried to breakdown the running as it was quite long and not really entertaining watching us job down the stairs, so I cut to the more dynamic of shots with use jumping and running round corners to add abit more drama to the footage.

This edit has 1 CG element and it was of the first track to test what how things looked and gave us some confidence in how to light and check if things are actually working.

Tuesday 15 February 2011

CG in live action Development!

Here is where I start to show the development of the cg into live action part of the project, as the creature will have to develop to the look we want for it to fit into the image. My role is director and editor, I will be also lighting all the scenes as well as helping Stephanie with the Rendering/Compositing. I will be modeling other props for the scenes, as well as changing texture etc for the creature, so still a lot of development to go on the creature still to do. I will also working with Sanjay with perfecting the rig playing with blendshapes for the muscles and facial expressions. I will be there with Joe and nick who will be animating the creature making sure it moves the way we want and that the animation fits the actions we wanted when thinking up the shots.

Creature Finished.. for Now!

Here are some quick renders of the creature using the rig quickly to put him in a pose. The texturing and the shape of the creature is as far as I can go at the moment. As its now time to give him to the animators to start animating and when it comes to lighting I can really refine the final image by going over the textures editing them if needed and playing with the shader but for now its time for others to work with e model while I sort out the editing and lighting setup for rendering process. The tongue, teeth and eyes have been textured now, but renders of those will be up soon. 

I am happy with the outcome. The lighting of the images was a quick HDR lighting dome to try get some reflections and specular as I created specular roll off and specular colour maps for the creature.


Finishing Touches

After getting the model into Maya I got a chance to see where work was needed and so I went back into Zbrush to boost up the skin textures and make sure the colour suited the areas. These images don't show the final textures but shows some of the development and areas I wanted to improve on.


The head took a bit longer that I thought. I really worked into the scars to make sure they didn't look like fresh cuts but older scratches that haven't truely healed. I had renders where the marks were bright red and so I tried to tone them down a bit. I added loads more skin texture to bring up areas around the scars.


The back legs came out really well in my eyes, to finish them off I add deeper wrinkles and marks as well as adding dirt and bumpy skin to the texture to show some contrast.


The 3 images below show the final work on the Arms, I wanted to make sure they were the right shape and had the marks and scratches to show the creature is a ruff and ready creature that has the ruff skin like a rhino.


Zbrush to Maya

Below are images showing the development of the creature from zbrush back into maya. I had a problem that kept occurring whilst bringing the texture and displacement maps back into maya, there were black lines where the uv edges were. At first I thought it was the uv's themselves but looking into it and doing some tests, I worked out that the texture wasn't bleeding over the uv borders so there an option to increase the level of bleed and the problem disappeared!

These images show the development of getting my detail from zbrush back into maya, also making sure the render times wasn't to long for us to render at the end.


The head was a very important part of the body for me as I wanted it to show how evil it was purely by the face with no expression so it would be easier on the animators as we only plan to convey one emotion during this film and thats anger!  The scars were important to get right as they add alot of character to the image and show that the creature is purely for fighting and killing.


The first image shows the first render I did with the body back in Maya, I was fairly happy with the outcome, but it shows the problem I had with the black lines. In this picture they are on the back of his head and top of his back leg, the problem is easily solved once I did many different tests experimenting with ways to get rid of it.

Thursday 10 February 2011

Creature Development!

Below shows development of the creature and its texture. They show my first draft of texturing and skin textures. Images are in order starting from bottom to top.


Adding colour to the creature was going to be the first time for me! As this model is going to be scene in live action, my modeling and texturing need to fit into the scene and the lighting I do will also give live to the creature and make it seem its really in the shot. The colour scheme in my mind was simple. Dark and scary, but creatures and animals live out in the wild, so loads of blends of grays, browns and other colours to show this creature is dirty and scruffy.


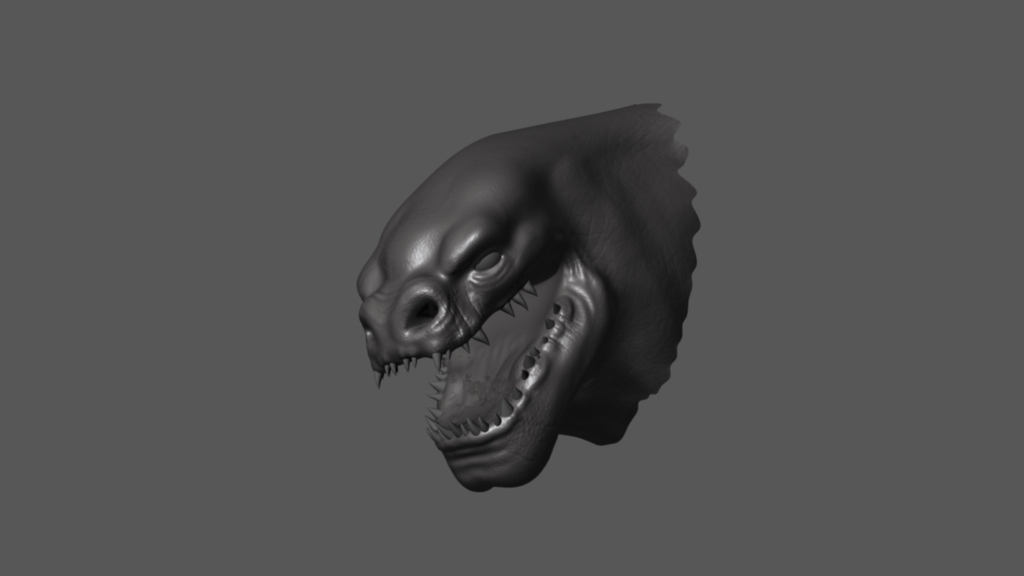
The head was an important part of the model for me. I wanted to show loads of character. The face without any blendshapes or textures looks evil already, but I have taken this further by adding battle scars. On one side of the head, one of the creatures will have huge scars down one side of his face to show this creatures are violent and hardcore.


These images show how I have added wrinkles, scratches and more scales to the model to get the model ready for colour as I wanted the surface to be ruff and scruffy as this creature is meant to be a predator and having smooth pretty skin would be the wrong idea! so scratches and ruff skin like a rhino was the path we wanted!


Here I have started to develop the skin textures.  Firstly by adding wrinkles as they will also needed the other textures on top of them so doing them last would make adding textures very complicated. After that I added the base texture, this part is purely to ruff up the surface and start to get rid of the smoothness of the skin and start to get some texture and something to work with.


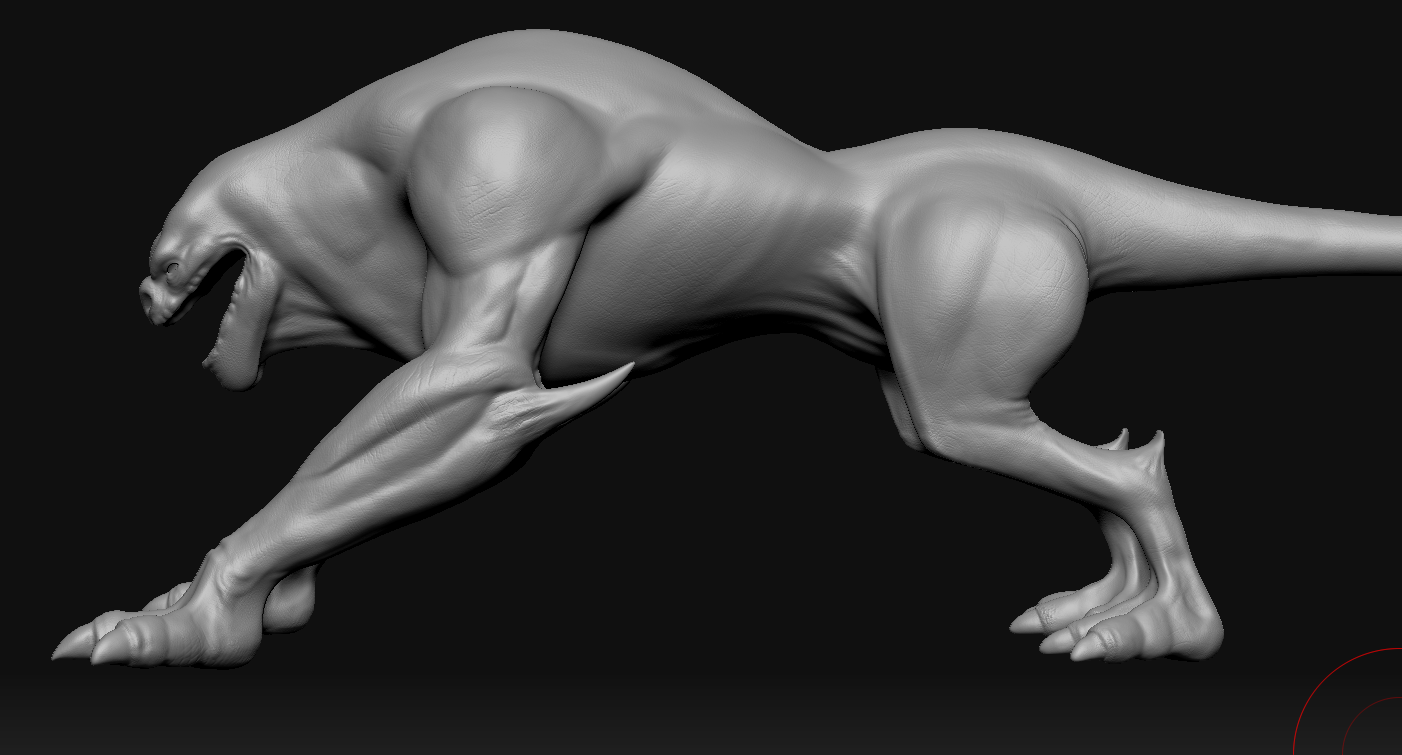
Here is the development of the arm. I sculpted the creatures arms very much like a human, as the character needed to be able to climb and a primate top half of the body seemed to suit this so giving very human like muscles and arms was an idea I went with.


First image shows the creature before I really started to add detail and refine the shape for the final model. Some problems I had with the model at this stage was the back legs needed reshaping as in the rig the bone bit was stick into the back of his calve.  So I plan to rework this as well as the feet. They are very plain. Under the neck I will tone down the wrinkles. I don't really thing they are working very well and look quite unnatural as the rest of the body is very toned and defined. Also I will rework the muscles of the arm as they are not in the right place compared to what the human arm has and looks unrealistic.